Tools for Replacing Knock Sensor
Tools Checklist
You need the right tools to change a knock sensor. Get these tools before you begin. This makes the job quicker and helps your cars work well.
- Socket set (metric and standard sizes)
- Ratchet and extensions
- Torque wrench
- Screwdrivers (flathead and Phillips)
- OBD-II scanner
- Multimeter
- Work gloves
- Safety glasses
Tip: Use a torque wrench so you do not make the knock sensor too tight. This keeps it safe and fits it right.
Parts Needed
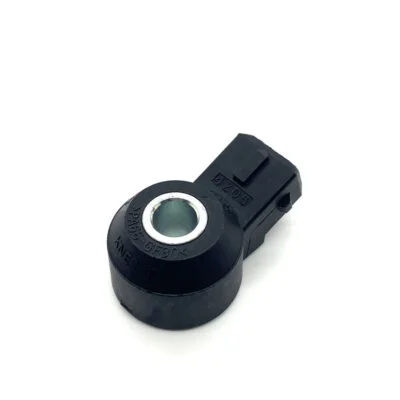
You should have the correct parts ready to use. The right knock sensor for your car is important. For example, Knock Sensor For Mitsubishi Lancer is a common replacement part, and choosing the correct one for your model year is key to proper performance. This helps your work cars stay on the road.
| Part | Purpose |
| Knock sensor | Finds engine knock |
| Replacement bolts | Holds the sensor in place |
| Electrical connector | Connects sensor to wires |
| Dielectric grease | Keeps electrical parts safe |
Look at your car manual to check the knock sensor type. Always use the sensor that matches your engine for the best results.
Safety Prep
Safety is most important when you fix an engine. Turn off the car and take off the battery cable before you touch the knock sensor. Wear gloves and safety glasses to stay safe. Make sure the engine is cool before you start. Hot parts can burn you. Keep your work area neat to stop accidents. These steps help you stay safe and protect your cars.
Replace Knock Sensor
Access the Sensor
You have to get to the knock sensor first. Most cars hide the knock sensor deep in the engine bay. It is usually under the intake manifold or near the engine block. Start by lifting the hood and making sure it stays up. Take off the undertray if your car has one. This lets you reach the sensor from underneath. Use a flashlight to help you find the knock sensor. Look in your service manual for the exact spot. In work vehicles, the sensor might be in a different place. Always check before you start.
Tip: Take a picture of the engine before you begin. This helps you remember where each part goes when you put it back together.
Remove Obstructions
You need to move things that block the knock sensor. These can be air intake hoses, engine covers, or wiring harnesses. Use your socket set and screwdrivers to take off these parts. Put bolts and screws in a labeled box so you do not lose them. In big work vehicles, you might need to move extra brackets or shields. Go slow and do not pull on wires. If you break connectors, you can have new problems after you put in the knock sensor.
| Obstruction | How to Remove |
| Engine cover | Unscrew and lift off |
| Air intake hose | Loosen clamps, pull gently |
| Wiring harness | Unclip connectors carefully |
| Brackets/Shields | Remove bolts, set aside |
Note: Always disconnect the battery before you touch wires. This keeps you safe and stops accidents.
Unscrew Old Sensor
When you see the knock sensor, you can take it out. Use a ratchet with the right socket size. Turn the sensor to the left to loosen it. If it feels stuck, push gently. Do not use too much force. You could hurt the threads in the engine block. Take off the electrical connector by pressing the tab. Pull the connector straight off. Look at the old sensor for rust or cracks. A bad knock sensor can have damage or rust. If you see oil or dirt, clean the spot before you put in the new sensor.
Alert: Do not drop tools or parts in the engine bay. Lost things can hurt the engine or slow down your work.
Install New Sensor
Get the new knock sensor ready to put in. Make sure it looks like the old sensor and fits the connector. Put a little dielectric grease on the connector pins. This keeps water and rust away. Screw the new sensor in by hand first. Use a torque wrench to tighten it to the right setting. If you make it too tight, you can break the sensor or engine block. If it is too loose, the sensor may not work well. Always use the torque value for your car.
- Screw the sensor in by hand to avoid mistakes.
- Use a torque wrench to make it tight enough.
- Put dielectric grease on the connectors.
Tip: Check the sensor’s spot before you tighten it. If it is not lined up, it may not work right.
Reconnect and Clear Codes
Put all the connectors back and put on the parts you took off. Put the undertray back and the engine cover too. Connect the battery cable again. Start the engine and look for warning lights. Use an OBD-II scanner to clear any error codes about the knock sensor. If the check engine light stays on, scan for new codes. Sometimes, a bad knock sensor causes more than one code. Make sure everything is connected and the sensor works. In work fleets, clearing codes fast keeps cars moving and saves time.
| Step | Action |
| Reconnect connectors | Attach all plugs securely |
| Replace covers | Install engine cover, undertray |
| Clear codes | Use OBD-II scanner |
| Test engine | Start and check for warnings |
Reminder: Always make sure the knock sensor works before you finish. Good installation stops engine problems and protects your business.
Conclusion
You completed each step with care and attention. Always use the right tools and double-check your work. Regular maintenance of the knock sensor helps your fleet run smoothly. Good habits protect your vehicles and prevent costly engine problems in the future.